
A section of e1m1.map in a text editor.
I'm going to describe the basics of how to use the map editor that I included with Crongdor the Barbarian, as well as some background about how the map format was designed.
My original design for the game was all based on a 2d board of square tiles (like checkers) that could be raised or lowered to different heights. This meant that I could express the world in discrete 2d coordinates - like the game Battleship, or how chess moves are described. But, most importantly, it meant that I could store a map in a text file, where each character described a tile's height:
12345678
11111111
11111111
11111111
If each character represents the height of a tile, and we say that each level is perhaps 2 units or 2 meters apart, then we have something like a chunky staircase of tiles in the top of this map. So, originally, I just used a text editor to design my maps. This is pretty common actually - a lot of 2d games will use a similar method, usually preferring to store each tile's information as a different coloured pixel in an image file and then editing the map in a paint program - same idea. Eventually, as you add complexity to your game, it becomes a little frustrating to work this way. The time/benefit scale tips to making it worth writing a full-scale "what you see is what you get" (WYSIWYG) editor.
The quickest route to a WYSIWYG editor was to re-use the existing game code that already loaded all the necessary props and characters, and displayed the map. I just copied Crongdor's main.cpp file into a slightly different version called editor.cpp that had different controls for editing, and commented out the lines that update the character movement, and so on. It would also have been possible to build a "live" editor into the game, so it went into edit mode when you press F2 or something - like the Sauerbraten engines. I decided to keep live game code as uncluttered as possible, because you'll see that there are many things that creep in to clutter your code, and it becomes harder to keep it all spinning in your short-term memory, and harder to debug. So, my editor is really just a rebuild of the main game, switching main.cpp with editor.cpp, which you can see if you look at the Makefile in the source bundle.
You can still hand-edit the map files, and that might be useful for some more subtle tweaks. The maps are stored in the maps/ folder and can be opened with any plain text editor - don't use a "rich text" editor, it'll mess up the formatting. Just be careful, some sections start with a "count" of how many items are in the section (number of props etc.), which you will have to manually update.
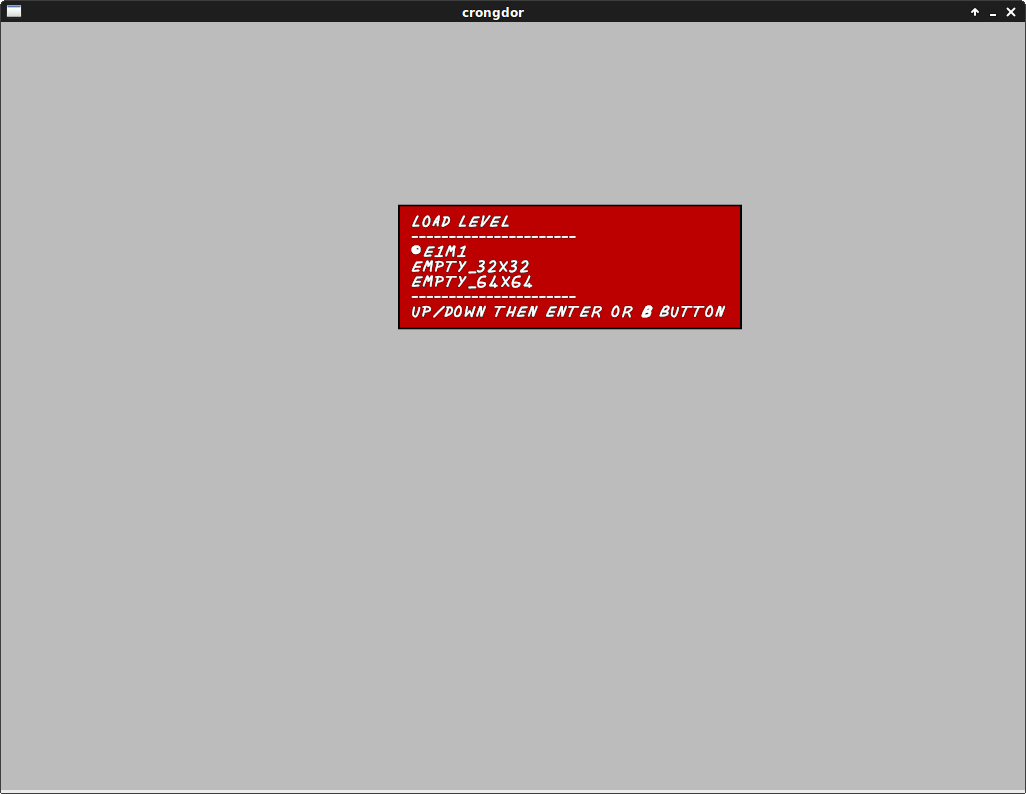
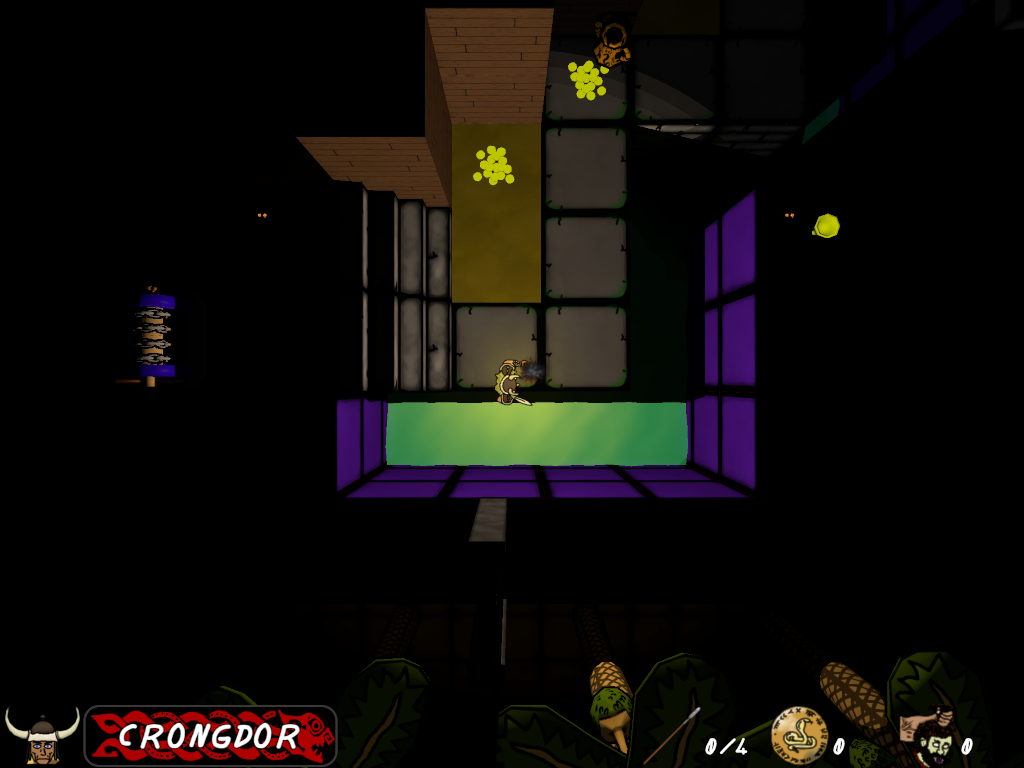
The first thing you'll see is this dialogue that asks you to load an existing map. This is everything listed in the editor/maps.txt file. "E1M1" is a quick copy of the first map in Doom that I made as an amusing example. You can load this to see how the different game elements work, or just start from scratch. The 32x32 tile size is suitable for most levels - the 64x64 size starts to get very hard to survive all the way to the end of the map! Scroll down and hit enter. I'll start on a blank map.
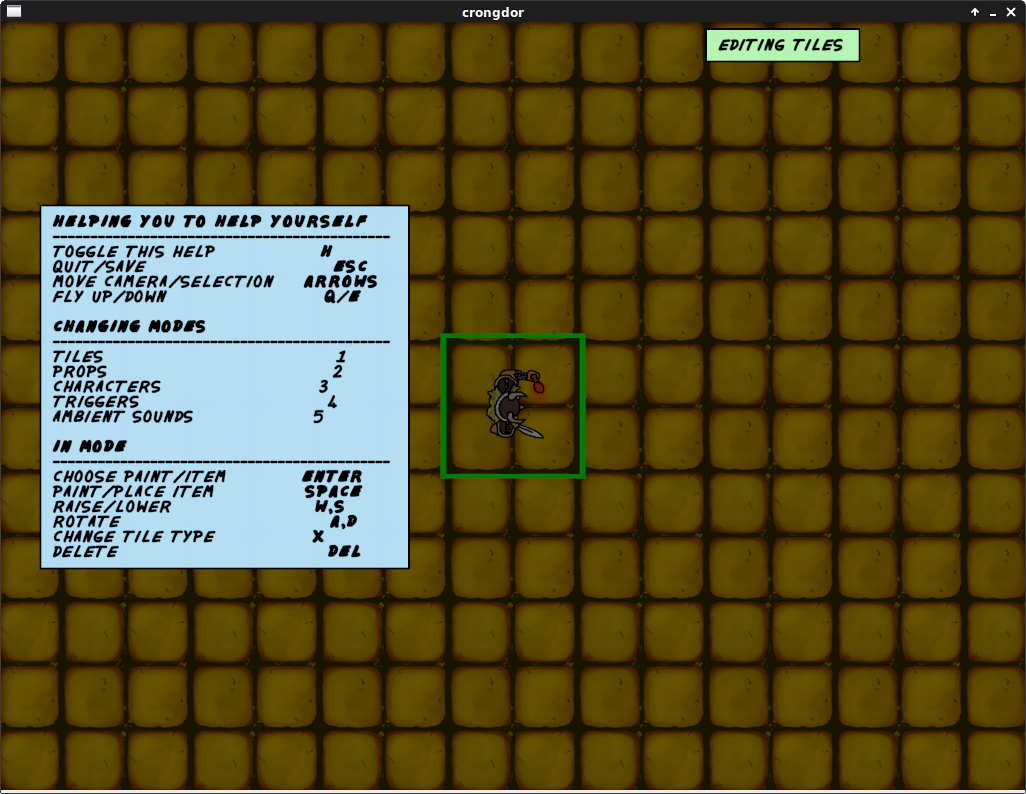
I don't like complex menu systems, and I didn't want to link in another library so everything is very minimal, and based on my existing text rendering functionality. I removed the mouse integration fairly early on to simplify everything. There's a hint in the bottom left that you can press H to list all the commands. Just about everything is listed there. The editor is split into modes so that the basic controls are re-used. The top-right colour-coded tab tells you which mode the editor is currently in; tiles/props/characters/triggers/sounds. I originally used the F-keys to switch modes but my Apple-using friends complained, so I switched to the number-key row!
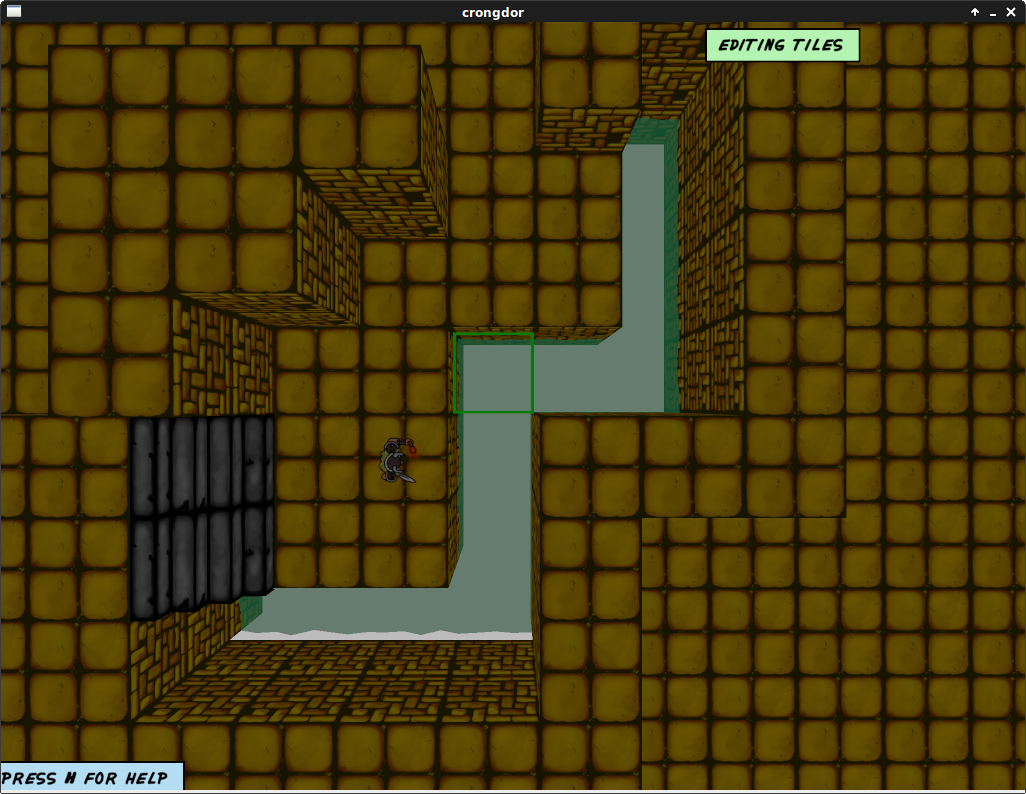
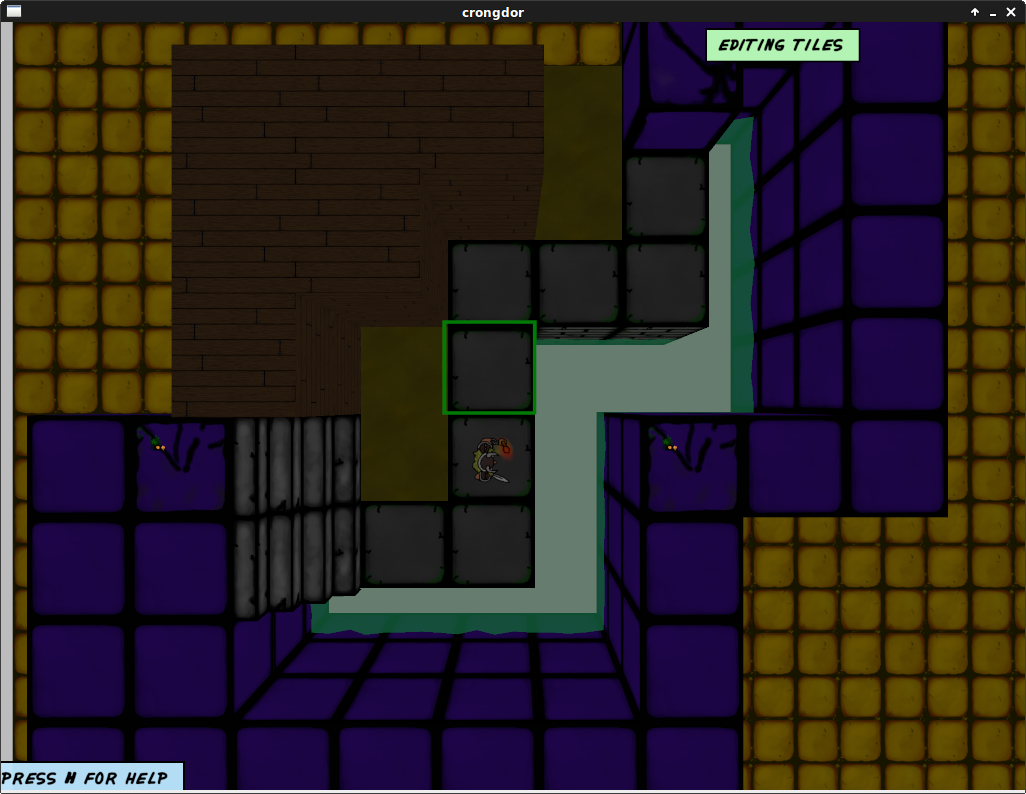
Okay, so you start in Tiles editing mode - let's edit some tiles! You can move the camera around with the arrow cursor keys. Pgup/Pgdn fly up and down. The green sprite shows you the 'current' tile that you'll edit, and this moves around under the camera in the centre of the view. You've probably already discovered that W and S raise and lower the tiles. You can also toggle a tile's "type" between flat/stairs/water with X. If some gaps appear bewteen walls - don't worry - the editor treats each tile as a separate mesh that it builds, but when the map is loaded whole regions are built into single manifolds (or "chunks") of tiles, so these gaps will be plugged.
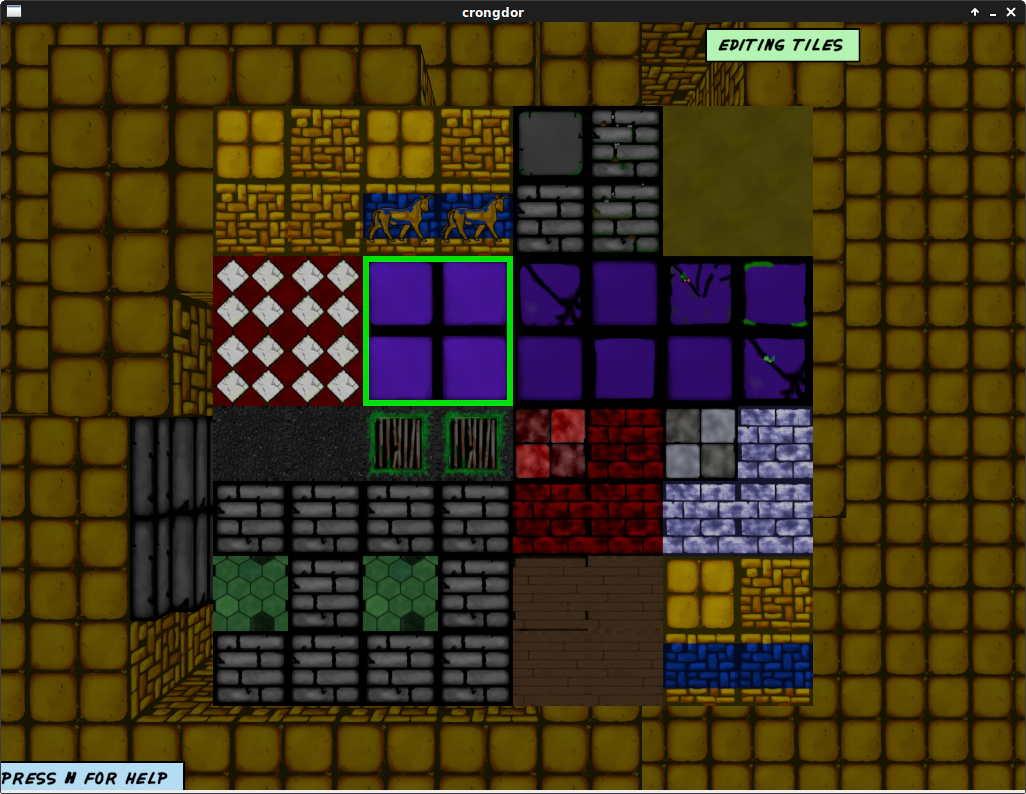
If you press return/enter you get a texture chooser. This is actually one big texture atlas called a "palette", sub-divided into 8x8 sub-images. Each 2x2 region is a set of 4 images that texture a particular tile. In this way the tiles have separate top and side textures, without you needing to specify each individually. Find an interesting texture and press return again to select it. If you press space bar it will paint the current tile with your texture. You can hold down space and move the camera around to paint a snake of tiles in one go.
You can switch to a different palette texture set - maybe you'll decide to make your own textures. Press esc to open the main menu and try switching to my copy of Doom's textures. It's called "Boom". There are actually 2 texture images named for each palette - a diffuse map (basic colours), and a specular/emissive map (shiny surfaces, with lights stored in the alpha channel).
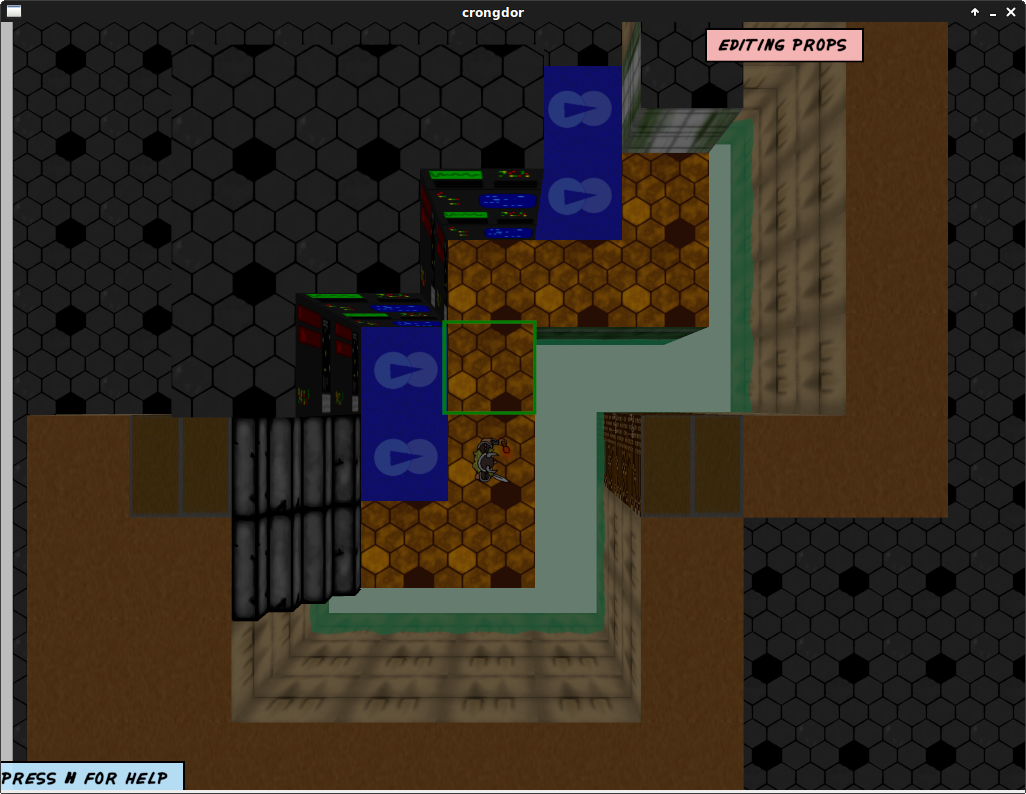
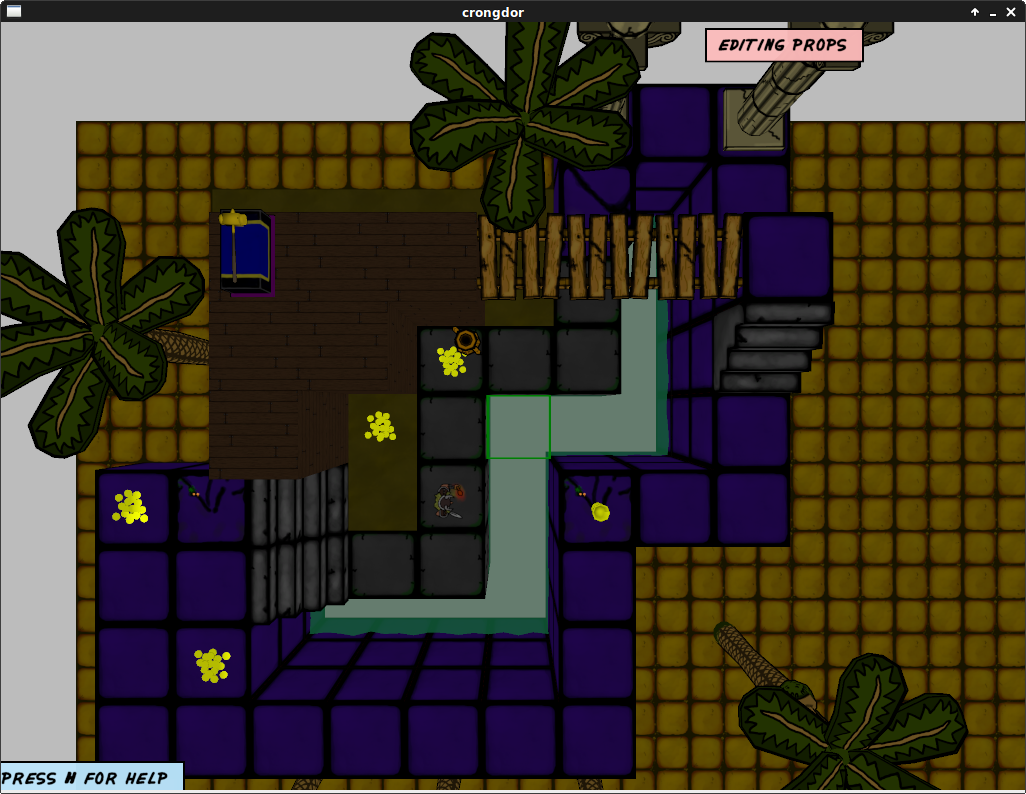
If you press the 2 number row key you'll go into Props editing mode. The controls are the same. This time press return to bring up a list of props to place down. Press space to place a prop in the world. You can rotate props with the A,D keys. In this way you might squeeze several "amphora" props into a single tile. You can also move them up and down different height levels, which suits things like the "dungeon bridge" prop, which you may not see after you place it down, as it starts a little below the lip of a tile so that it doesn't cast odd shadows on neighbouring tiles. You can delete a prop, when in Props mode, with the DEL key.
The "monolith interior" prop is the end-of-level portal, with "monolith exterior" being the cosmetic prop that surrounds it. It comes as 2 different props, because the interior bit with the wobbly animation uses a different shader set, and I simplify each prop so that each can only have one shader set.
Press 3 to go into character editing mode. Characters work exactly the same way as props. They only caveat is that there should only be one Crongdor character, and it should be the first character in the list, which is why he starts in the empty map template. If you delete him and another character is the first in the list...well, try it later!
Press 4 to go into character editing mode. Some of the things in the game transmit a signal when they are "triggered";
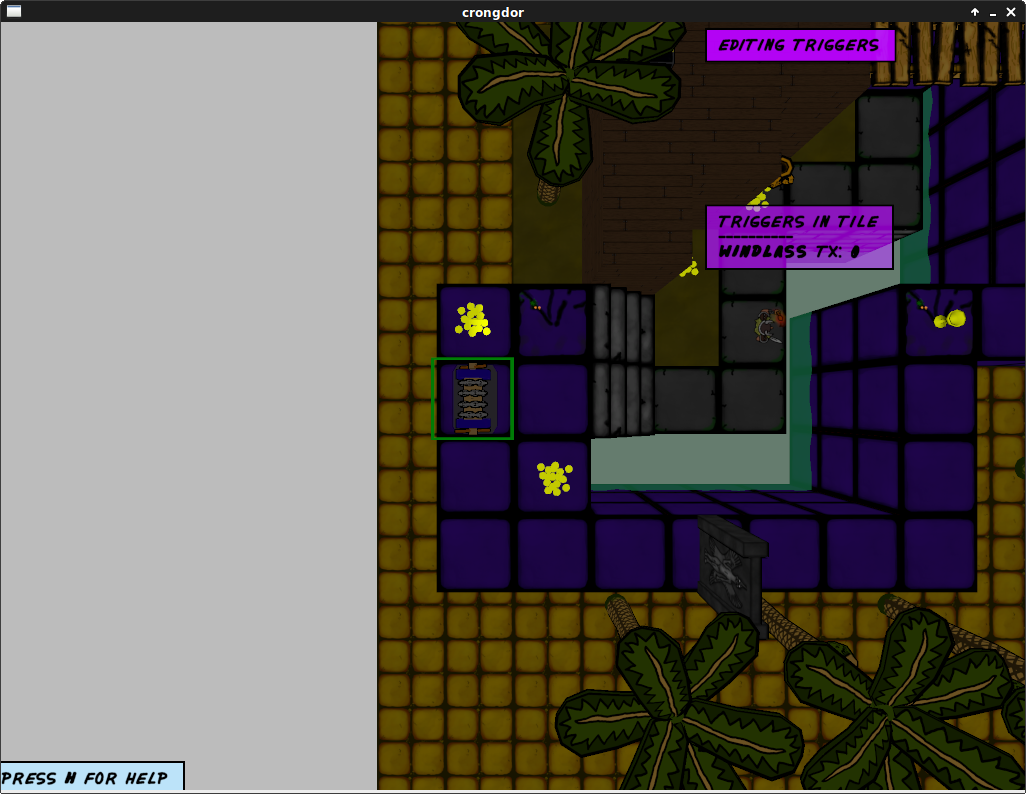
In Triggers mode, if you hover the cursor over these props you'll see a purple dialogue show, for example, "WINDLASS TX: -1". This means that my windlass prop can transmit a code. Right now it's set to -1, which means "ignore". If you hover over it and press W,S you can change its code. 0 or higher is a valid code. I'll set it to 0. Now, you've probably guessed, that anything that I set down in the map that can receive a code can be set up with a matching code number. Receivers include:
You can have more than one thing trigger the same code, and more than one thing receive that code. I thought about "AND" and "OR" types of props so that you could do stuff like have a door open, only if a specific combination of triggers are activated, but those kind of puzzles didn't really fit the fast-paced idea of the game.
You can add and edit the pop-up narrative text boxes in the main menu ESC. This may be a little confusing, but you write a string of text, including the reciever code, and a code for an RGBA colour for the box. Multi-line text is separated by entering "\" followed by "n". The empty map templates come with some text already defined for various receiver codes. If you go to "edit pop-up texts" you'll see how the format works. This is probably something that's easier to tweak by hand-editing the map file.
If you hit number key 5 you can edit ambient sounds that you can hear at different places in the level. Once again press return to get a list of sounds that you can use. If you press return again you should get a preview played. Press space to place it somewhere in the map. You'll see a cube indicating the centre position of the sound emitter. Move the camera out and you'll see a sphere indicating its radius. The sounds are coded to have a linear roll-off, so you'll hear them at full volume when the camera is on the same spot as where you see the cube, and not at all outside the sphere. This should work in the editor too (WYHIWYG?). The ambient sounds are set to a fixed position over the terrain (as the camera is in the game). In this case W,S do not move the sound up and down, but change the range of the sound - you'll see the sphere shrink and grow. Delete a sound with DEL.
You can choose the music track in the main menu too. The "hammer track" is an additional music track to switch to when Crongdor picks up the maul (hammer) - I didn't use this in the final version because I went with the war drums, but I was going to switch to a Rock and Roll track at this point. The functionality is still there if you feel inspired. I'll go over adding custom assets like music to the game in a later post.
The map editor probably still has some crash bugs in it - save your map often! You can do this in the main menu (ESC). Note that you don't get prompted to save when you go to quit, so you'll have to do that yourself.
Your map will be saved in the game's maps/ folder with the rest of the maps. The editor will append your map to the list of maps to put in the "Custom Maps" menu in the game. This is the editor/maps.txt file, which you can hand-edit if you like. So, if you start the game, and go to the Custom Maps sub-menu, you should be able to launch it from there! It will have the default description and title, which I would hand-edit in the map file later.
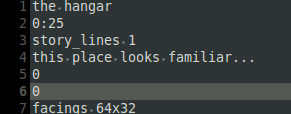
It's easier to edit things like the map story text by hand-editing the map in a text editor.
You'll notice that the comic book font that I drew for the game doesn't have any lower-case letters. It has all-caps, and a bold version of each. I copied a comic-book caption style for the text pop-ups. This means that when you write lower-case it appears as upper-case in the font. I used upper-case to indicate that you want bold - that way I was able to just use the C language's default ASCII functions for text. So, if your title is "The Tower of the Elephant", you'll need to write it as "the tower of the elephant", or it's going to look like "The Tower of the Elephant"!
I wrote this on a Sunday morning when I was feeling a bit bleary-eyed, so let me know if you'd like clarification on anything, or have any other comments! We're trying forums on crongdor.com, and there are comment sections below this post on crongdor.com.